How to Soften a Stiff Leather Jacket (5 Proven Methods)
- Quick Answer: How to Soften a Stiff Leather Jacket Without Ruining It
- Before You Start: Check Leather Type & Condition
- Quick Reference: 5 Proven Methods vs Myths
- The 5 Proven Methods to Soften a Stiff Leather Jacket
- "Destroy Your Leather" Myths to Avoid
- Daily Habits to Keep Leather Soft
- Rapid-Fire FAQs
- Ready for a Fresh Start?
Quick Answer: How to Soften a Stiff Leather Jacket Without Ruining It
| Wear it and move in it. | Body heat and repeated flexing at the elbows, shoulders, and collar relax the fibers naturally. |
| Roll and knead it gently. | Lay it flat and work it by hand – no sharp folds, no aggressive twisting. |
| Apply a thin layer of pH-balanced leather conditioner. | Focus on stiff flex points. Let it absorb, then buff off any excess. |
| Use light, controlled moisture. | A fine mist or steamy bathroom – not soaking – followed by wearing while slightly damp, then air-dry on a wide hanger. |
| Avoid: | Heat sources (dryers, radiators, hairdryers), vinegar, machine washing, and heavy kitchen oils. These permanently ruin jackets. |
You slip your arms into a brand-new jacket – perhaps one of our men’s leather jackets – and it feels like putting on a piece of furniture. Boxy. Board-stiff. A little squeaky at the shoulders when you reach forward. That’s not a defect. That’s how good leather behaves before it’s broken in: the fibers are tight, the topcoat is fresh, and the collagen structure hasn’t yet learned the shape of your body. It’ll get there. But it helps to know what you’re doing.
The other scenario is equally common. You pull a leather jacket out of the back of the wardrobe after a couple of dry seasons and it’s stiff, inflexible, and fights you every time you bend your elbow. That’s dryness – the natural oils (fatliquors, in technical terms) that keep leather supple have slowly evaporated, leaving the fibers compressed and stiff. Same result, different cause, slightly different fix. And leather goods are a huge industry precisely because people care about keeping them in shape: the global leather goods market reached approximately $431 billion in 2025, a figure that reflects just how much investment goes into quality leather – all the more reason to protect it.
Search online for solutions and you’ll find some genuinely terrible advice. Throw it in the washing machine with a tennis ball. Blast it with a hairdryer. Rub in olive oil. Dunk it in the bath. Soak it in vinegar. These are not hacks – they’re ways to destroy a jacket while feeling productive. We’ve seen the results: cracked topcoats, warped shells, permanently darkened leather that looks like it aged forty years overnight. This guide covers 5 proven methods that actually work, explains the physical reason each one works, and gives you the hard truth about what to avoid.
Before You Start: Check Leather Type & Condition
Not all leather responds to the same treatment. Before you do anything to a stiff jacket, spend two minutes understanding what you’re working with.
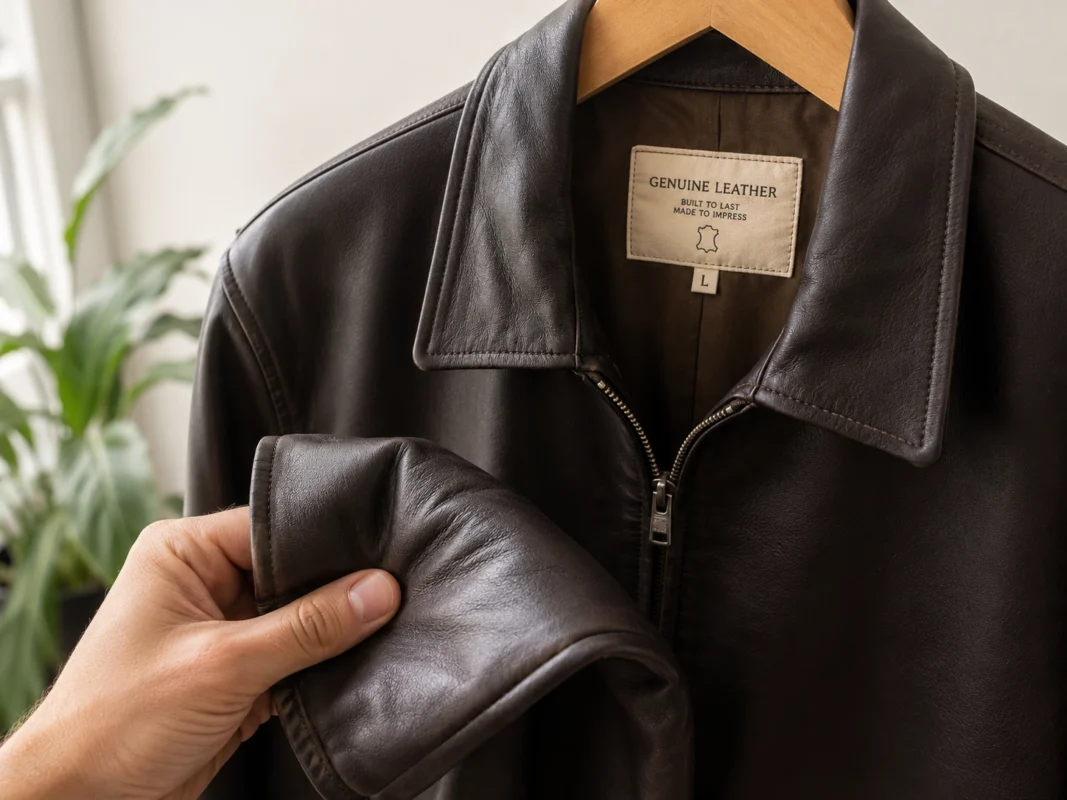
Read the care label. It’s usually stitched inside the collar or along the lining seam. Any specific warnings – no water, dry clean only, specialist care – take precedence over general advice. If the label’s gone, check the brand’s website or reach out directly.
Know your leather type. Most jackets sold for everyday wear are finished leather – the grain surface has a protective topcoat that makes it relatively forgiving for home care. Suede and nubuck are completely different: they have no protective surface coat and need specialist products. Very delicate aniline leather (full-grain, dye-only, no topcoat) shows every watermark and requires a very light hand. If you’re unsure which you have, check out our breakdown of the types of leather jackets – it covers this in detail. If you’re still weighing whether your jacket is genuine leather at all, our real vs faux leather jacket guide will help you confirm before you invest time in care.
Assess the condition honestly. A brand-new jacket that’s stiff but structurally intact responds well to all five methods below. An older jacket that’s stiff and dry but has no visible cracking is still a solid DIY candidate. But if you see deep cracking, flaking finish, surface delamination, or mould patches, stop. Those signs mean the leather has degraded past what conditioner can fix at home, and working it aggressively will cause more damage, not less. That’s a job for a professional.
One rule applies regardless: always spot-test. Apply any product to a hidden area – inside the hem, underside of the collar, inside a cuff – and let it sit for 15–20 minutes before touching the rest of the jacket. Leather can react to conditioners in unexpected ways, especially older or heavily treated pieces.
Quick Reference: 5 Proven Methods vs Myths
Use this as your go-to guide before trying anything.
| Method / Idea | Does It Actually Work? | Risk Level |
| Wearing and moving in the jacket | Yes – the single safest method for new jackets. Body heat softens fibers gradually at natural flex points. | Low |
| Gentle rolling and flexing by hand | Yes – effective for surface tension and stiff drape. Works well alongside daily wear. | Low |
| Thin layer of pH-balanced leather conditioner | Yes – replenishes the fatliquors leather loses over time. Critical for dried-out older pieces. | Low (if used correctly; over-conditioning is a real risk) |
| Light, controlled moisture + air dry | Yes, with caution – slight dampness followed by flex and natural drying can loosen fibers noticeably. | Low–Medium (depends on leather type and how wet) |
| Professional reconditioning (severe dryness) | Yes – the right call when DIY would risk permanent damage to finish or structure. | Low (in pro hands) |
| Washing machine / dryer “hack” (MYTH) | No – mechanical agitation and heat destroy the collagen structure, crack topcoat, and shrink leather. | VERY HIGH |
| Vinegar / harsh DIY solutions (MYTH) | No – strips protective finish and oxidises grain. Can cause permanent colour shift. | HIGH |
| Heavy kitchen oils, random creams (MYTH) | No – clogs pores, permanently darkens leather, turns rancid, attracts mould over time. | HIGH |
The 5 Proven Methods to Soften a Stiff Leather Jacket
Method 1 – The Wear-In Routine
This is the right first step for any new jacket that’s stiff but undamaged. Wear it. That sounds obvious, but most people either avoid wearing a stiff jacket because it’s uncomfortable, or try to shortcut the process with products before the leather has had a chance to move.
Put it on over a thin hoodie or base layer and just live in it for 30–45 minutes around the house. Bend your arms. Reach forward. Sit down and stand up. Do the zip a few times. Reach across your body. The goal is to work the flex points – elbows, shoulders, the zipper placket – because those are the areas where fibers need to loosen first. Body heat builds up inside the jacket as you wear it, gently warming the grain and topcoat. That warmth, combined with repeated movement, is what starts to relax the collagen structure and encourage a softer drape. As Decrum’s 2026 break-in guide notes, regular wear is the most effective and safest method because it applies all three softening forces at once – body heat, directional movement, and moisture vapour.
How long should you expect? It depends on the hide. A thick cowhide motorcycle or biker jacket typically takes 15–20 full wear sessions over 3–5 weeks before the shoulders and elbows stop fighting your movement. A lambskin fashion jacket reaches a comfortable broken-in state in as few as 5–10 wears. Don’t try to do a week’s worth of break-in in one afternoon. Short sessions over several days work far better than forcing the jacket to fold aggressively in one go.
- Do: Wear it for short sessions, 30–60 minutes, over several consecutive days.
- Do: Move naturally and deliberately through the stiff areas – arms, shoulders, collar. Layer underneath for warmth; it accelerates the process.
- Don’t: Force extreme stretches or sharply fold the jacket to try to speed things up. Don’t sit on it or hang heavy objects from it.
Method 2 – Gentle Rolling & Flexing by Hand
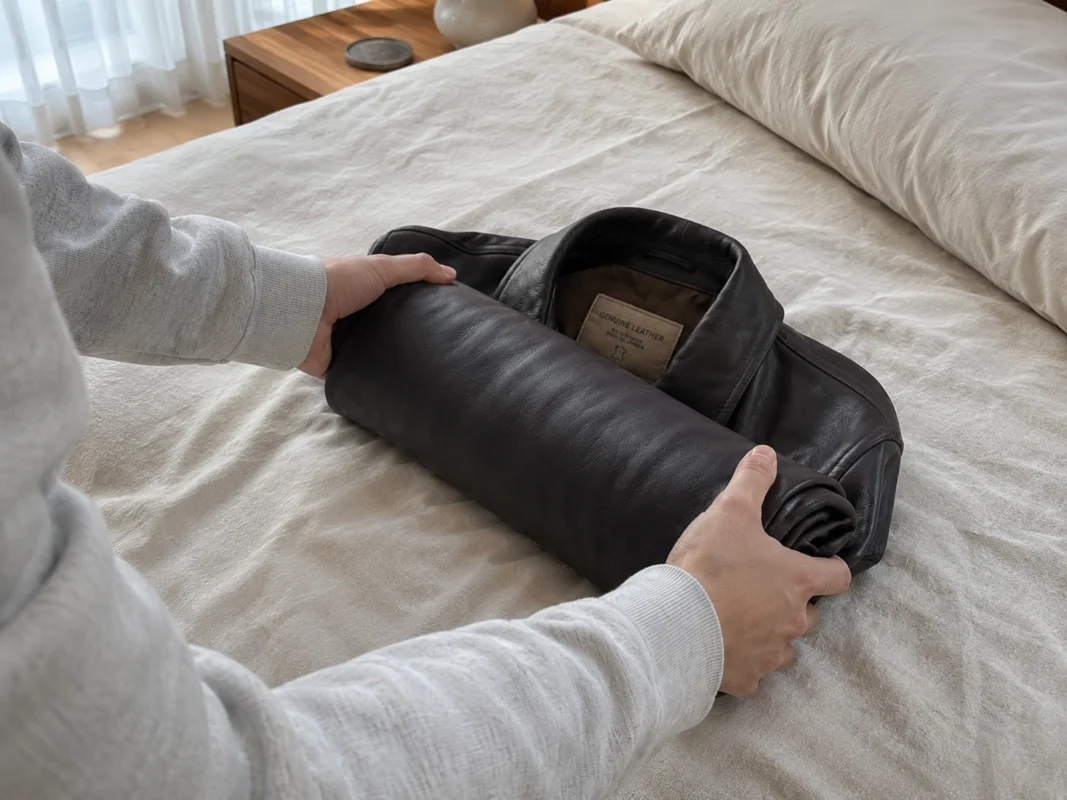
This works best in combination with Method 1, or on its own for jackets you can’t comfortably wear while they’re board-stiff. Lay the jacket face-down on a clean, flat surface – a bed or large table works well.
Fold it loosely widthways so the front panels meet, then roll the whole thing into a soft cylinder from the collar down toward the hem. Don’t crease it hard – the roll should be relaxed, not compressed. Hold it rolled for about ten seconds, then gently unroll it back to flat. Repeat four or five times.
Then work the sleeves. Pick up each one and gently knead the leather between your palms – similar to how you’d work bread dough, but lighter. Focus on the elbow area and the cuff, which tend to be the stiffest zones. You’re reducing surface tension and encouraging the leather to accept a softer drape without creating permanent creases in the finish.
The key word throughout is gentle. Aggressive twisting or sharp folding doesn’t soften leather – it stresses the topcoat and can cause hairline cracking along crease lines, especially on newer jackets where the finish is still tight.
- Do: Use slow, deliberate rolling motions. Keep the leather’s natural curves in mind.
- Don’t: Fold it sharply at a 90-degree angle or wring the sleeves to force them to bend.
- Don’t: Sit on it, stomp on it, or use any mechanical pressure – we’ve heard of people trying this.
Method 3 – Targeted Leather Conditioner
If your jacket is genuinely dry – not just new and firm, but dried-out and losing some of its surface sheen – a proper leather conditioner is essential. This is where the difference between a well-maintained jacket and one that cracks in five years gets decided.
Start clean. Before applying any conditioner, brush off dust and surface grime. Our full guide to cleaning a leather jacket at home covers the right approach in detail. A light wipe with a barely damp cloth handles surface dust; for heavier grime, use a dedicated leather cleaner first. Conditioning over dirty leather traps contaminants under the product layer.
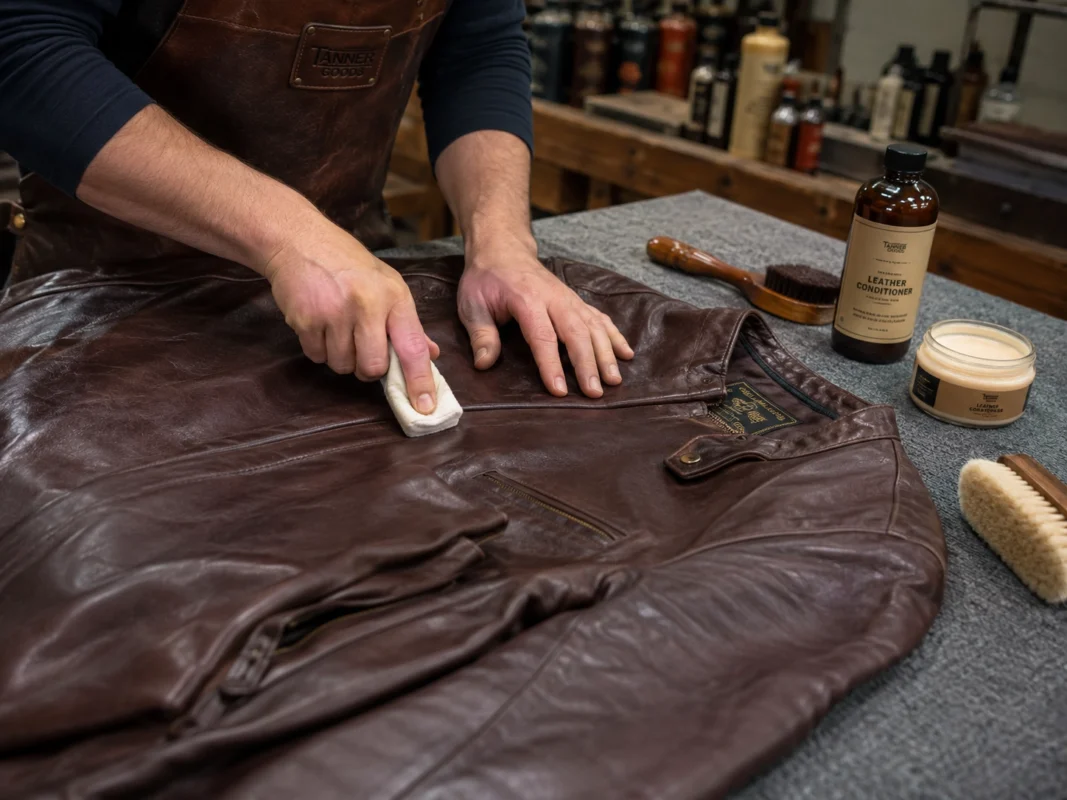
Choose the right product. Use a dedicated leather conditioner – not body lotion, hand cream, or coconut oil. Purpose-made conditioners are formulated to penetrate the grain at the right molecular weight without clogging pores or leaving a residue. As Men’s Journal’s January 2026 expert guide on softening leather notes, pure oils like neatsfoot or mink oil may work beautifully but require more experience – too much can darken leather or leave it feeling greasy and attracting dust. Lexol and similar pH-balanced products are well-regarded for good reason. Avoid anything with petroleum distillates or silicone – silicone creates a glassy surface layer that prevents the leather from breathing.
Apply thin, not thick. Work a small amount – about the size of a pound coin – onto your fingertips or a soft cloth and massage it into the stiffest zones first: elbows, shoulders, the collar, the zipper placket. You should feel the conditioner warming slightly under your fingers as you work it in. Let it absorb for 15–20 minutes, then buff away any excess with a clean, dry cloth.
Over-conditioning is a real problem that doesn’t get talked about enough. Applying too much product, or conditioning too frequently, clogs the grain’s natural pores, can darken the leather permanently, and in extreme cases makes it spongy and weak. Thin layer, let it absorb, buff off excess. That’s the rhythm.
- Do: Spot-test first, always. Use a pH-balanced, purpose-made conditioner.
- Do: Focus on flex points and areas that feel papery or look slightly grey/ashy.
- Don’t: Apply a thick, generous coat thinking more is better. It isn’t.
- Don’t: Use olive oil, coconut oil, or any random kitchen product as a substitute.
Method 4 – Light, Controlled Moisture + Air Dry
This method sounds counterintuitive – leather and water have a complicated relationship – but controlled moisture application is a legitimate technique used by leather technicians to restore flexibility to stiff or dried-out pieces. The operative word is controlled.
There are two approaches. The first: take a clean spray bottle filled with plain water, mist the jacket very lightly from about 30cm away, wait two minutes, then put it on and wear it as it dries. The slight dampness helps the fibers relax, and body heat combined with movement as it dries encourages the leather to soften and conform. The second approach is even gentler – hang the jacket in a steamy bathroom for 10–15 minutes (steam from a shower, not direct contact with a steam iron). The humidity in the air slightly rehydrates the surface without introducing water directly.
Either way, after the moisture phase: hang the jacket on a wide, padded hanger in a well-ventilated room away from any heat source and let it air-dry naturally. This is non-negotiable. Aero Leather’s 2026 care guide makes the point clearly: leather should only be dried naturally at room temperature – never with direct heat from radiators, hairdryers, or sunlight. Rushing the drying process with heat is where this method goes badly wrong.
What you’re not doing: soaking the jacket in water, running it under a tap, or leaving it in rain. Heat plus rapid moisture removal is the formula for cracked leather, a warped shell, and potentially stripped finish.
- Do: Use a fine mist or ambient steam only. Work gently while the leather is slightly damp.
- Do: Follow up with a thin application of conditioner once fully dry.
- Don’t: Saturate the jacket. This is a slight rehydration, not a bath.
- Don’t: Use any artificial heat source to speed up drying. Not even a hairdryer on cold.
Method 5 – When to Call a Professional
Some jackets are past the point where home care is the right move. That’s not a failure – it’s just reading the situation correctly. A professional leather technician has access to commercial-grade reconditioning products, pH-controlled solutions that penetrate deeper than consumer conditioners, and the skill to address problems without making them worse.
Go professional when you see: Deep cracking along the grain. Flaking finish that comes away when you flex the leather. Heavy water staining with tide marks. Any sign of mould or mildew. Or if the jacket is expensive, sentimental, or irreplaceable and you’re not confident in DIY methods.
What a good leather technician can do that you can’t at home: deep reconditioning with heated application, fatliquor reintroduction for seriously depleted leather, finish repair where the topcoat has delaminated, and recolouring for cases where conditioning has pulled colour unevenly. Some will also address structural issues – loose stitching at flex points, peeling lining – in the same service.
If the jacket is only moderately stiff and in otherwise good structural condition, the four DIY methods above are your starting point. But when the leather is telling you it needs more than that, listen to it.
- Do: Research leather restoration specialists (not dry cleaners – different process entirely).
- Do: Get a quote and an assessment before committing. A good tech will tell you honestly what’s fixable.
- Don’t: Attempt deep conditioning or repair on cracked, flaking leather at home. You’ll likely make it worse.
“Destroy Your Leather” Myths to Avoid
These get passed around as life hacks. They’re not.
The washing machine and dryer trick. Someone on a forum will tell you to throw the jacket in a gentle cycle then tumble-dry on low with a couple of tennis balls. Here’s what actually happens: the mechanical agitation stretches and stresses the stitching, the water penetrates unevenly and swells the fibers, and then the heat of the dryer removes that moisture too fast – contracting the leather, cracking the topcoat, and in many cases permanently shrinking the jacket. The tennis balls do nothing useful.
Leaving it on a radiator or in front of a heater. Heat drives moisture out of leather faster than it can naturally reabsorb. What you end up with is leather that’s temporarily less stiff but far more brittle – and then cracks within a few wears. Even leaving a jacket in a hot car for a day repeatedly will degrade it over time.
Rubbing in olive oil, coconut oil, or other kitchen fats. These are the wrong molecular size to penetrate leather properly, so they sit on the surface, clog the grain’s pores, and go rancid over time. The jacket ends up smelling unpleasant and looking permanently darker – often unevenly.
Vinegar, rubbing alcohol, or harsh DIY cleaner across the whole jacket. Vinegar strips the protective finish and oxidises the grain, causing permanent colour shifts – often a greenish or washed-out tinge on dark leathers. Alcohol dries leather aggressively. These are occasionally used in tiny, targeted applications by experienced technicians. On a whole jacket by someone without that experience, they’re extremely destructive.
Aggressive steaming, pressing with an iron, or running it through a garment steamer. Steam irons and direct garment steamers deliver concentrated heat and moisture simultaneously, which deforms the grain, destroys the topcoat, and can cause irreversible imprinting. If a wrinkle is bothering you, hang the jacket on a wide hanger in a warm room and let gravity and time do the work.
Daily Habits to Keep Leather Soft
The best maintenance routine is boring – and that’s the point. Leather does well with consistency and poorly with neglect.
Hang it properly. Always on a wide, padded or contoured hanger that supports the shoulders. Wire hangers deform leather at the shoulder seam over time, creating permanent dents in the structure. If you’re investing in quality leather jackets – whether that’s a men’s biker leather jacket or something more understated – it’s worth spending a few pounds on the right hanger.
Keep it away from direct sun and heat. UV breaks down the dyes in leather and dries the grain. Radiators and heated airers nearby are equally damaging – consistent indirect warmth over months does the same damage as a single acute heat event, just more slowly.
Wipe and condition seasonally. For a jacket worn regularly, conditioning once or twice a year is plenty. If it lives mostly in a wardrobe, once a year at the end of winter when it comes out of storage is a reasonable rhythm. Always clean before you condition – conditioner over grime traps it underneath.
Rotate your wear. If you have multiple jackets, this matters more than it sounds. One jacket absorbing a full winter’s worth of daily wear ages faster at the flex points. Rotation lets the leather recover between sessions.
Rapid-Fire FAQs
How long does it take to soften a stiff leather jacket?
It depends on the leather type. A thick cowhide biker or moto jacket typically needs 15–20 full wear sessions over 3–5 weeks before the shoulders and elbows stop fighting your movement. Lambskin fashion jackets can reach a comfortable state in 5–10 wears. Don’t rush it – the gradual process produces better results than any shortcut, and the jacket will ultimately mould to your body rather than a generic shape.
Is it safe to use a hairdryer to soften a leather jacket?
No. Even on a low or cool setting, a hairdryer concentrates heat in a small area, which drives moisture out unevenly and can crack the topcoat. If you want to gently warm a jacket to accelerate conditioning absorption, wear it – your body heat is gentler and far more evenly distributed.
Can I soften a leather jacket with olive oil or coconut oil?
You’ll find this suggestion everywhere, and it’s one of the worst things you can do. Both oils are the wrong molecular weight for penetrating leather’s grain effectively, so they sit on the surface, attract dust, and go rancid. The jacket will darken – often permanently and unevenly – and smell unpleasant over time. Stick to a purpose-made leather conditioner.
Does wearing a leather jacket in the rain make it softer?
Light rain exposure is generally survivable for most finished leathers and can, in small amounts, introduce the kind of controlled moisture described in Method 4 above. The problem is what happens afterward: if you hang it near a radiator or in direct sun to dry fast, the leather contracts and stiffens again. If you’re caught in rain, hang it on a wide hanger away from heat and let it air-dry naturally, then condition once fully dry.
How often should I condition my leather jacket to keep it soft?
Twice a year for actively worn jackets is a reasonable baseline. Once a year is usually enough for occasionally worn pieces. The real signal is the leather itself: if it starts looking slightly chalky or grey along the flex points, or if it feels noticeably stiffer after storage, it’s time. More frequent conditioning isn’t better – it can clog the grain and darken the leather unnecessarily.
Is it bad if my leather jacket is still a bit stiff after a few wears?
Not at all. New leather – especially thicker full-grain leather used in quality biker and moto jackets – can take several weeks of consistent wear to soften properly. Some stiffness in the first few wears actually signals good, dense leather rather than a thinly processed hide. Use the wear-in routine and gentle rolling methods, and be patient.
When should I stop DIY and see a leather specialist instead?
When you see cracking, flaking finish, delamination, mould, or heavy structural damage – stop all DIY immediately. The same applies if you’ve already tried conditioning and the leather shows no improvement. A leather specialist can assess the actual condition of the hide and apply treatments that aren’t available over the counter. Attempting to condition or work severely damaged leather at home typically makes the damage worse.
Ready for a Fresh Start?
If you’ve worked through these methods and the jacket still isn’t cooperating – or if it’s simply too far gone to be worth saving – it might be time to invest in a well-made piece that will actually soften and age well over years of wear. Browse women’s leather jackets and men’s leather jackets at Jacketstown – each piece is selected for leather quality and construction that rewards proper care.